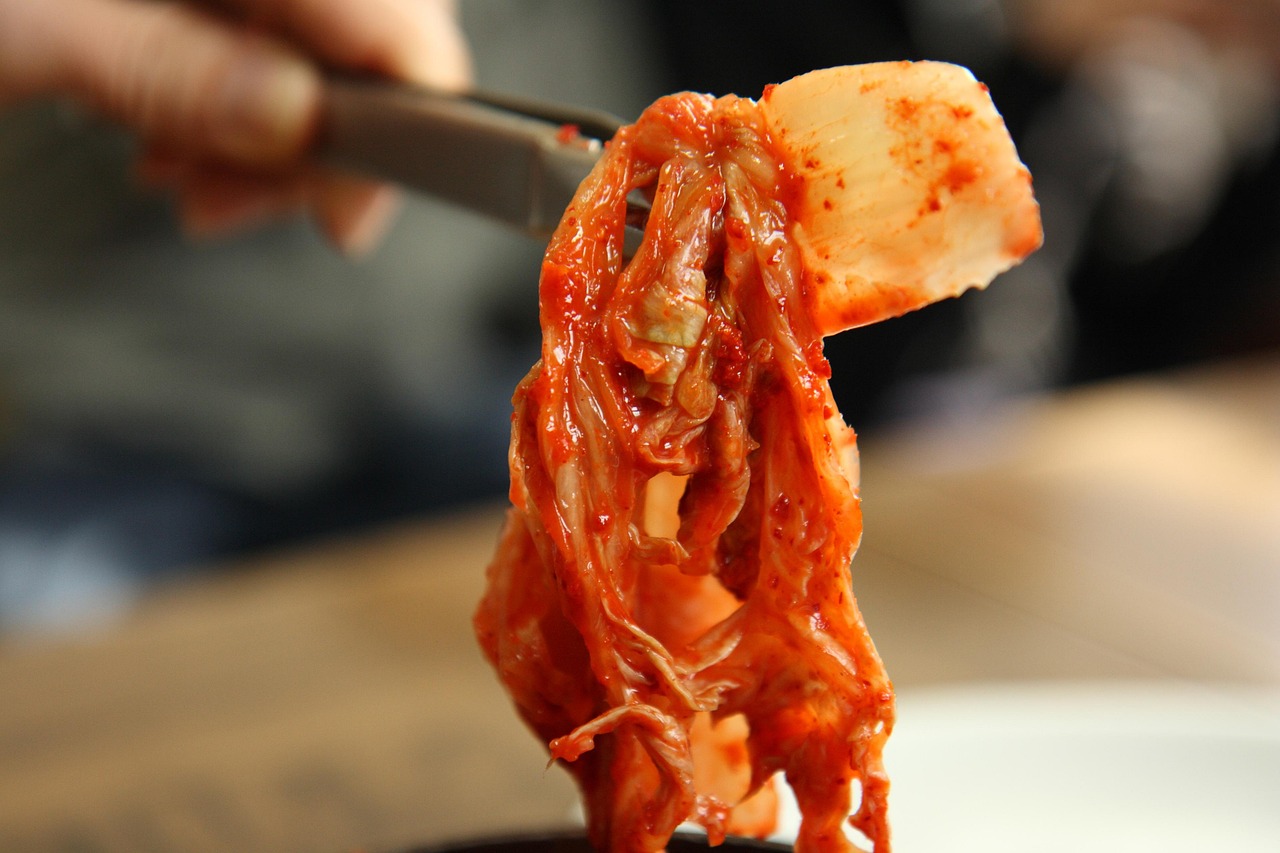
There’s something deeply comforting about a jar of homemade kimchi fermenting quietly on the bench. We’ve been making kimchi for years now—sometimes in big batches during the cooler months when Copenhagen Market or Napa cabbage is firm and sweet ,sometimes just a few jars at a time. The process has become a bit of a ritual in our kitchen: the chopping, salting, mixing by hand, and tucking it all into jars with the satisfaction of knowing we’ve created something nourishing, alive, and deeply flavorful.
Our journey with kimchi started years ago when we first tasted the vibrant flavors of this traditional Korean dish. It was during a family gathering where our grandmother shared her secret recipe, and from that moment, we were hooked. Each ingredient has its own role, contributing to the complex flavor profile that defines kimchi. The sweetness of the Copenhagen Market or Napa cabbage balances the heat from the gochugaru, while the garlic and ginger add warmth and depth. This balance of flavors is what makes kimchi a beloved staple in many households.
Moreover, the health benefits of kimchi go beyond just gut health. The fermentation process not only boosts probiotic levels but also enhances the bioavailability of nutrients. Studies have shown that regularly consuming fermented foods like kimchi can improve immune function, reduce inflammation, and even aid in weight management. Additionally, the vibrant colors and unique textures make it visually appealing, encouraging people to incorporate it into their meals.
If you’re new to making kimchi, consider starting with a basic recipe before experimenting with different vegetables and spices. Other ingredients like cucumbers, radishes, or even fruits like pear can be added to create unique flavors. Each variation brings its own twist to the traditional recipe, allowing for creativity in the kitchen. Remember, the key to a successful kimchi lies in the quality of your ingredients and the time you allow it to ferment, so be patient!
Kimchi is more than a side dish—it’s a probiotic powerhouse, rich in vitamins A, B, and C, and packed with gut-friendly bacteria that support digestion and overall health. It’s spicy, sour, tangy, and savory all at once, and honestly—no two batches are ever exactly the same. That’s part of the joy.
If you’ve never made your own before, don’t worry—it’s easier than you think, and incredibly rewarding.
Having the right equipment not only makes the process easier but also ensures your kimchi ferments correctly. For example, a fermentation-safe jar prevents air from entering while allowing gases to escape, reducing the risk of spoilage. Investing in high-quality tools can enhance your experience and the final product. Furthermore, having a dedicated space in your kitchen for fermenting can help keep things organized and efficient.
🫙 The Best Jars & Equipment
To make kimchi at home, you don’t need fancy gear, but a few good-quality tools help:
- Large mixing bowl (ceramic or stainless steel)
- Knife and chopping board
- Gloves (to protect your hands from chili if sensitive)
- Fermentation-safe jar – We recommend a 1L to 2L wide-mouth glass jar with an air-tight lid or fermentation lid with an airlock. The Bormioli Rocco Fido jars or Kilner clip-top jars work beautifully.
- Glass weights (optional, but helpful to keep the kimchi submerged)
🌶️ Ingredients (Makes about 2L)
- 1 large Copenhagen Market or Napa cabbage (about 1–1.5kg)
- 1/4 cup sea salt (non-iodized)
- Water (filtered if possible)
It’s essential to pre-measure your ingredients before starting the process. This step not only saves time but also ensures you have everything needed at hand, reducing the chance of interruptions. Preparing a ‘mise en place’ can greatly enhance your cooking experience. For instance, chopping all your vegetables and measuring spices before you begin mixing will make the entire process smoother and more enjoyable.
For the paste:
- 1 tablespoon grated ginger
- 4 garlic cloves, minced
- 1 small onion, finely grated or pureed
- 1 tablespoon sugar (or honey/maple syrup)
- 3 tablespoons Korean red pepper flakes (gochugaru) – adjust to your spice level
- 2 tablespoons fish sauce (or tamari for vegan version)
- 1 small carrot, julienned
- 4 spring onions, chopped
- 1 small daikon radish, julienned (optional)
- 1 tablespoon rice flour (optional, helps bind the paste)
🥬 Step-by-Step Instructions
1. Prep the cabbage
Chop the cabbage into quarters lengthwise, then into bite-sized pieces. Place in a large bowl and sprinkle salt between the layers. Add enough water to cover. Press it down with a plate or weight. Let it soak for 1.5–2 hours, tossing once or twice.
2. Rinse and drain
After soaking, rinse the cabbage thoroughly under cold water 2–3 times to remove excess salt. Drain well in a colander for 15–20 minutes.
3. Make the paste
In a small saucepan, whisk the rice flour with 1/2 cup water over low heat until it thickens (if using). Let it cool. In a mixing bowl, combine ginger, garlic, onion, sugar, gochugaru, fish sauce, and the cooled flour paste (if used) into a thick, red paste.
4. Mix it all together
Put on gloves and combine the cabbage, carrot, radish, and spring onion in a large bowl. Add the paste and massage it through until everything is coated evenly. Take your time here—the flavors really build as the paste mixes with the vegetables.
5. Pack into jars
Firmly pack the mixture into your sterilized jars, pressing down as you go to eliminate air pockets. Leave about 2–3cm of space at the top. Pour in any leftover juice. The brine should cover the vegetables. Place a weight on top if using, and seal the lid.
6. Ferment
Leave the jar at room temperature (out of direct sunlight) for 2–3 days. You may want to “burp” the jar once a day if you’re using a regular lid to release gas. After that, move it to the fridge, where it will continue to slowly ferment. It’s usually good to eat after 5–7 days, but some prefer it more aged (2–3 weeks or more).
💚 Why We Love It
Not only is kimchi tangy and full of umami, but it also supports our health in quiet, powerful ways. The natural fermentation promotes a healthy gut, which is linked to better immunity, mood, and digestion. Plus, it’s packed with antioxidants and fiber, and pairs perfectly with rice bowls, eggs, grilled meats, soups—or just straight out of the jar with chopsticks in hand.
💡 Tips from Our Kitchen
- Always use clean utensils to remove kimchi from the jar to avoid contamination.
- Don’t worry if it bubbles or smells pungent—that’s normal (and encouraged)!
- Kimchi lasts several months in the fridge, often improving in flavor over time.
There’s something deeply satisfying about seeing a row of jars, fizzing softly, full of spicy, living food made by your own hands. We hope you enjoy making this kimchi as much as we do—it’s become part of our seasonal rhythm, and we can’t imagine our kitchen without it.
1. Prep the cabbage
After cutting the cabbage, it’s important to allow it to rest with the salt for the full time indicated. This step draws out moisture and helps soften the leaves, making them easier to mix with the paste. You can also add other vegetables to the mix at this stage, enhancing the texture and flavor profile of your kimchi.
2. Rinse and drain
Make sure to taste the cabbage after rinsing. It should be salty but not overpowering. If it tastes too salty, rinse it an extra time. This step is crucial because it sets the foundation for the flavor of your kimchi.
3. Make the paste
Feel free to adjust the amount of gochugaru based on your preference for heat. Some people enjoy a more fiery kimchi, while others prefer a milder taste. Adding a bit of sweetness, like honey or sugar, can also help balance the heat, enhancing the overall flavor. You can also experiment with adding other spices such as turmeric for added health benefits and a unique flavor twist.
4. Mix it all together
While mixing, don’t be afraid to get your hands dirty! The process of massaging the paste into the vegetables is not only therapeutic but also allows the flavors to meld beautifully. This is where the magic happens, so take your time and enjoy the process. Feel free to add other ingredients that you love—perhaps a sprinkle of sesame seeds or a squeeze of lime for an extra pop of flavor.
5. Pack into jars
As you pack the kimchi into jars, press down firmly to release air bubbles. This helps in creating a more even fermentation environment. You can also layer the kimchi with some whole leaves of cabbage or additional vegetables to create a visually appealing presentation when you serve it later.
6. Ferment
During fermentation, taste your kimchi daily to check for flavor development. Each day will bring a new depth of flavor as the fermentation process progresses. When it tastes just right to you, it’s time to move it to the fridge. Remember, kimchi can continue to ferment even in the fridge, so the flavors will evolve over time.
Happy fermenting! 💛 Enjoy your journey with kimchi and remember that the best part is sharing it with others!